Pipeline Execution
Once a pipeline is successfully created and validated within a project, it's ready for execution. A newly created pipeline is shown in Fig. 1.
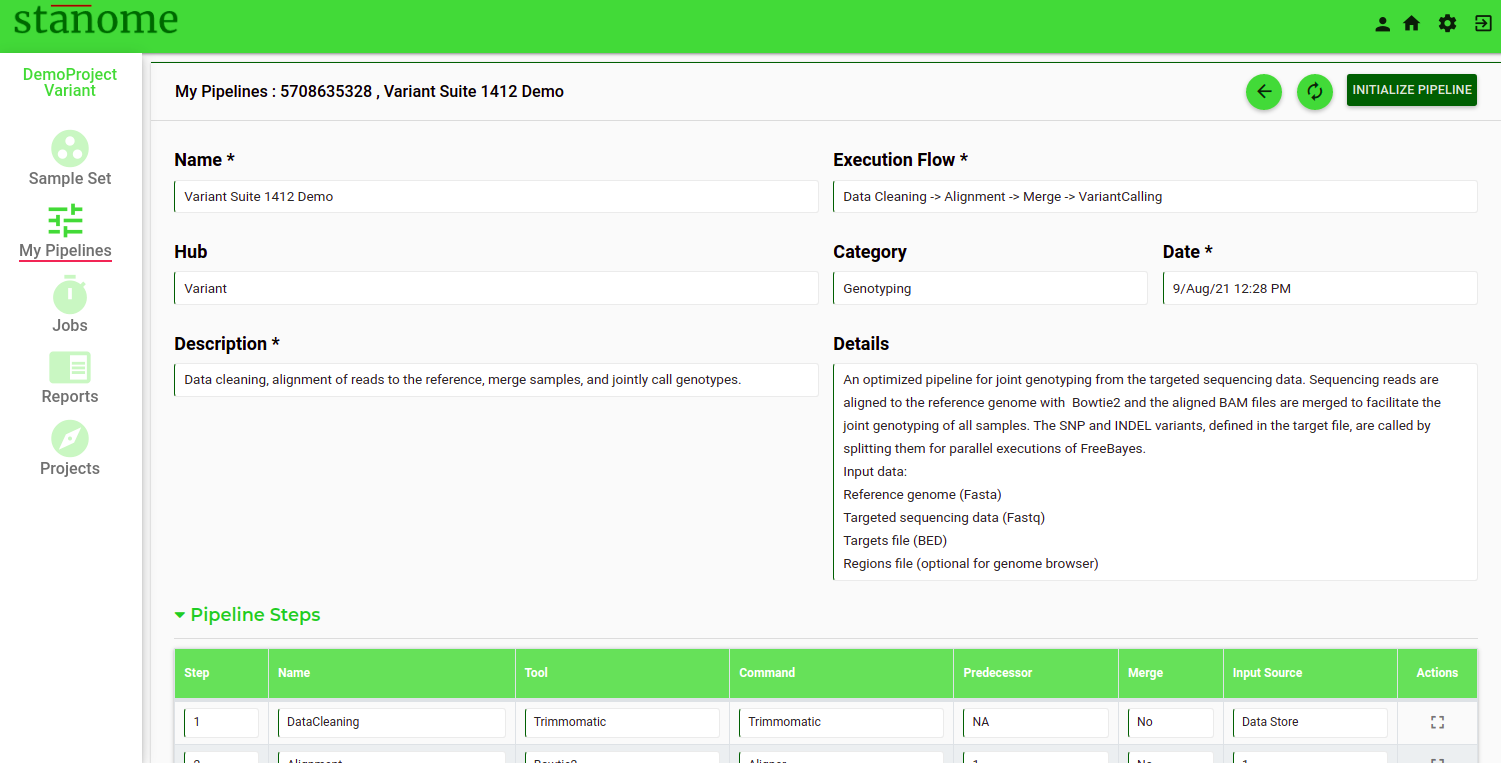
- The following actions are allowed on the Pipeline window: view/delete/edit/initialize.
-
- Pipeline deletion
- Pipeline edit
- Page refresh
- Back navigation
- Pipeline initialization
-
- Click to access the Run Pipeline dialog box (Fig. 2). Final data selections happen during this stage and all fields are required to be filled. The contents of the dialog box change dynamically based on the analysis type and the tools in the pipeline.
- Provide a unique Run Tag
- Sample Set selection from the drop-down shows the sample names in a tabular format
- Select the plate format: 96-well or 384-well (This information is extensively used in the Reports to show the results in the plate format)
- Fill in the sample set table with the plate format details and control sample information.
- Latest reference genomes and corresponding additional files are preselected based on the organism of the project. Please confirm or change the selections using the drop-downs.
HINT: The contents of the metadata files can be viewed by clicking the icon
CAUTION - Differential Suite pipelines need at least two conditions with two replicates for each. Variant Suite pipelines need properly formatted target files.
- Agree to the terms and conditions to enable .
- Click to run the Pipeline.

Computing resources are initialized upon pipeline execution. The pipeline window automatically refreshes and redirects to the jobs window. Executed jobs appear in the jobs table. Refresh the window if the job is not visible. Jobs wait in the queue until computing resources are available and the status appears as pending and changes to Running. An email is sent when the job starts and also upon completion.
Pipeline Cancellation
Click the STOP button on the JOBs window to cancel an active pipeline execution and this will abort the run.
Pipeline Deletion
Click to delete a Pipeline from the Pipeline window (Fig. 1). This action deletes the pipeline records entirely from a project and can’t be retrieved.