Project Setup
A new project can be created in two ways.
- From the Dashboard window - click the icon
- From the Projects window - click on the upper right corner
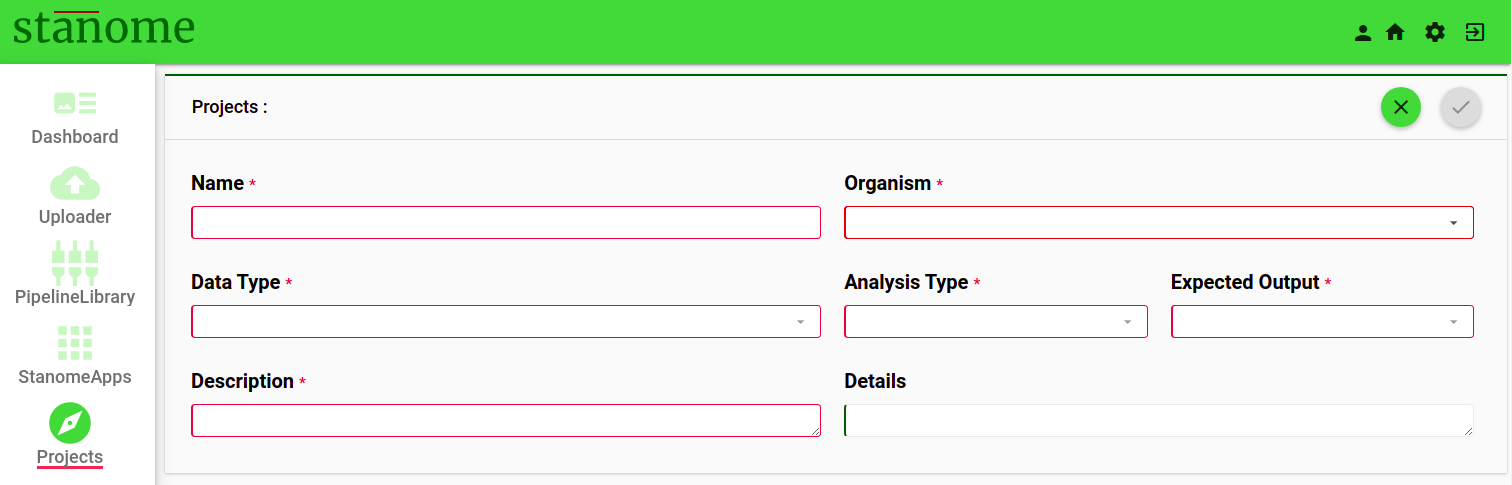
A new project can be created from the Project setup window (Fig. 1). Fill in the seven mandatory fields with details and appropriate descriptions. The data in this form is used for automatic reference file(s) selection and will be exported to the final report.
CAUTION - Organism enables appropriate reference file(s) selection.
-
- Name* - Provide a unique name for the project.
HINT - Project name cannot be longer than 30 characters and alphanumeric characters and spaces are only allowed.
CAUTION - Project name should be unique.
-
- Organism* - Select the organism from the drop-down menu. We currently support eight main model organisms and some custom species.
HINT - Select Other if the organism is not listed and contact Stanome technical support team to add a new organism to the list.
-
- Description* - Provide a brief description of the project (Example: The gist of the experimental design and the aim of the study).
- Data Type* - Select sample type from the drop-down list [Microbiome, Targeted Genome, Transcriptome, and Whole Genome]. The Data type field is tightly connected with the Hub field in the pipelines.
HINT - Carefully choose the Data type to get the relevant pipeline suggestions.
-
- Analysis Type* - Select the experiment type from the drop-down list [ABR Screening, Alignment, Annotations, Data Cleaning, Data QC, Differential Expression, Genome assembly, Genotyping, Proband, Serotyping, Species Classification, and Variant analysis].
- Expected output* - Select expected output(s) from the drop-down list [BAM, Coverage Metrics, DE Genes (Differentially Expressed Gene list), FASTA, Genotypes, Ontology, Pathways, and VCF (Variant Calling Format)].
Multiple options can be selected.
-
- Details* - Provide detailed information about the project. (Example: Aim of the experiment, conditions studied, experimental design, and any other pertinent details).
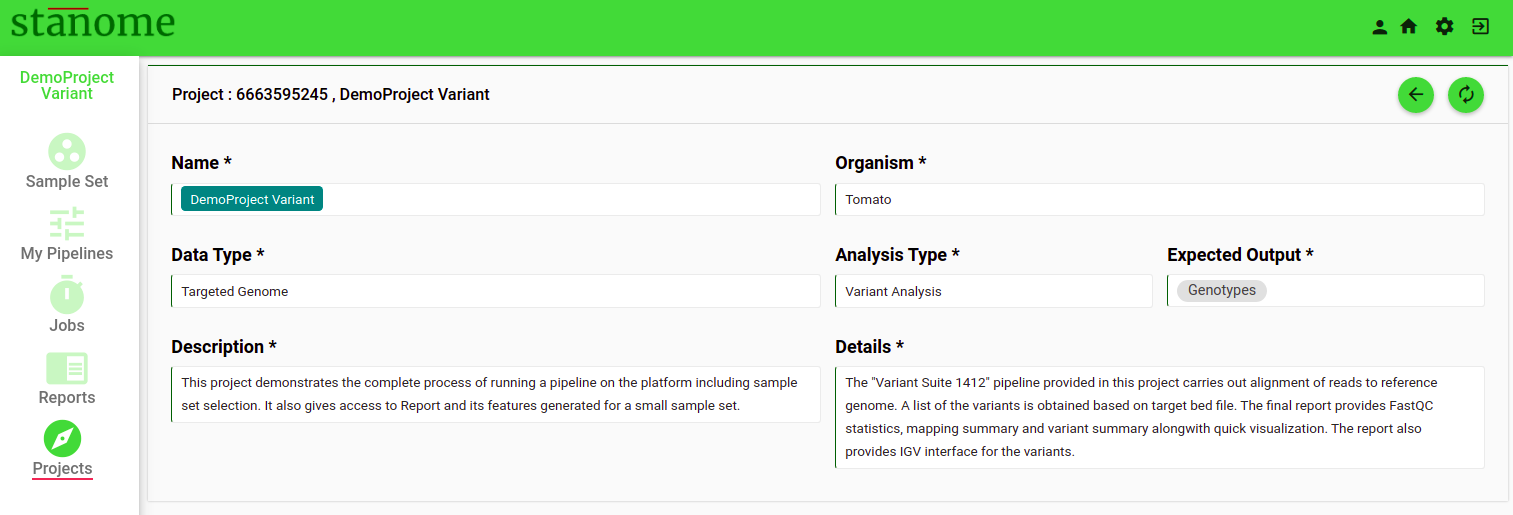
Click to save the project. The new project is saved and displays the Project Main window (Fig. 2), where the project-specific menu is available on the left menu. The project can be navigated with Sample Set, My Pipelines, Jobs, and Reports, and details of these four features are described in the following sections.
Projects can be deleted using the icon from the Projects window. All the components within a project (sample sets, pipelines, jobs, and reports) are deleted permanently.